
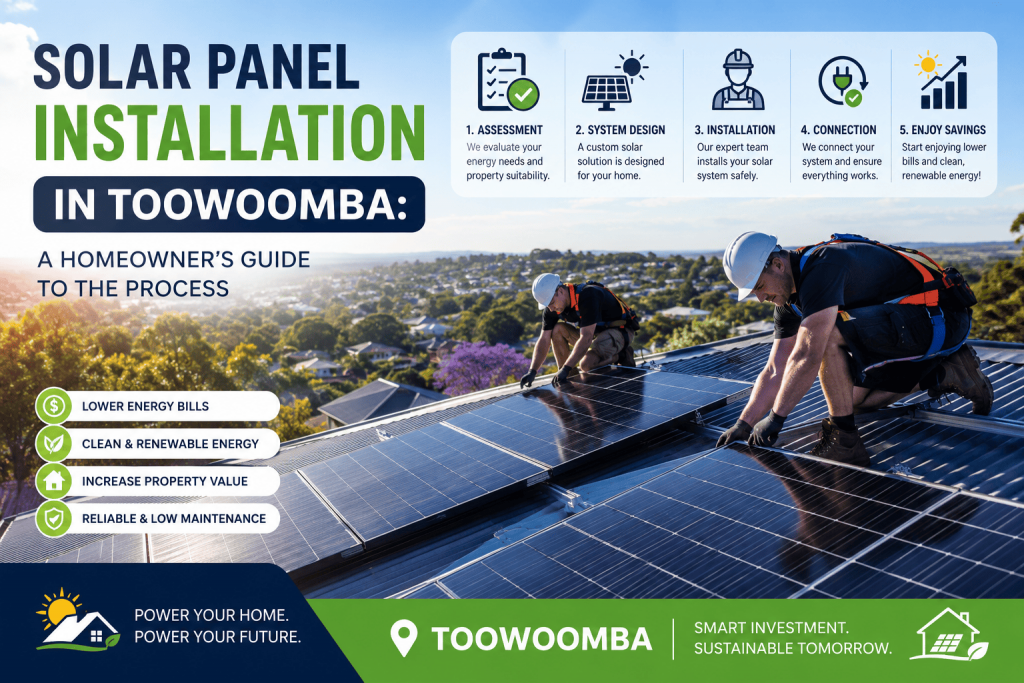
Getting solar panels installed shouldn’t feel like a big guess. By the time someone comes to your roof, you should understand what’s going to happen, why it’s happening, and what to expect next. But often, installers just give you a quote, ask you to sign something, and leave you in the dark until the day of installation.
Quick answer: From the first call to having a working solar system, most residential solar installations in the Hunter region take between 4 to 8 weeks. The actual installation day usually takes about 6 to 8 hours. The waiting time is mostly for the design, ordering, approvals, and scheduling, not the actual installation.
HOW LONG DOES SOLAR INSTALLATION TAKE IN Toowoomba?
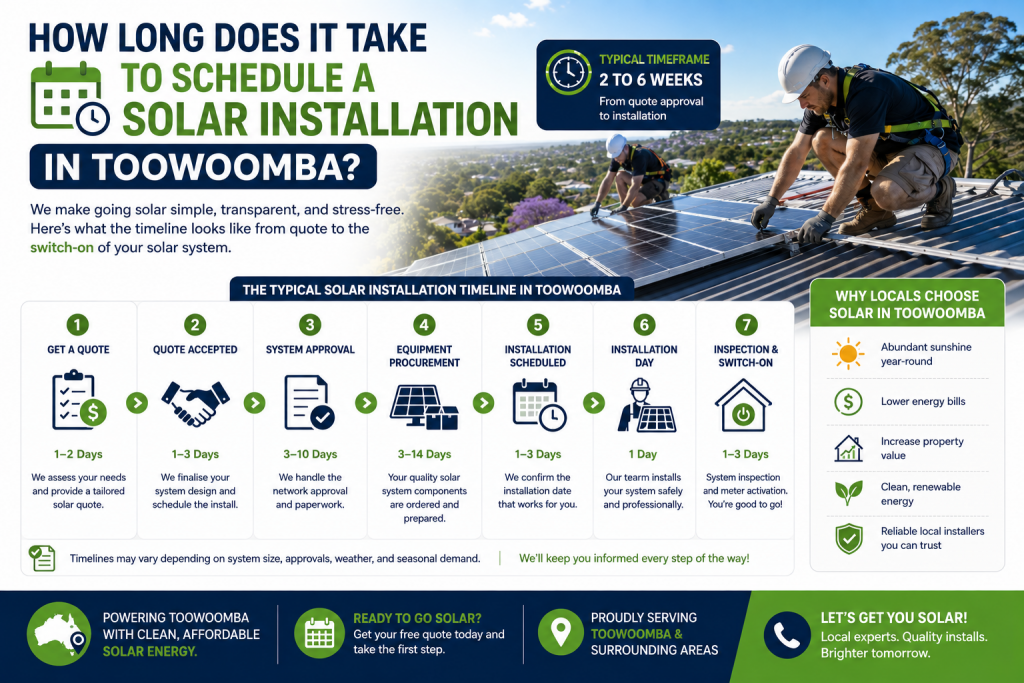
Most residential solar panel installations in Toowoomba usually take 4 to 8 weeks from the first enquiry to having a working system. The actual installation takes one day for most homes. The rest of the time is spent on design, paperwork, ordering equipment, and getting approval from Ausgrid for connecting to the grid.
Here’s a rough timetable:
- Weeks 1-2: Enquiry, roof assessment, design, and getting a quote
- Weeks 2-4: Ordering equipment and submitting grid connection applications
- Weeks 4-8: Scheduling the installation and the actual installation day
- After installation: Approval for grid connection and system activation (1 to 5 days)
It’s also important to remember that industry demand can affect how long the installation takes.
What should a solar quote actually include?

STEP 1: GETTING A QUOTE
Most solar quotes start with a phone call or an online inquiry, followed by a site assessment—either in person or through satellite roof analysis. A good quote isn’t just a price. It should tell you the size of the system (in kW), the expected daily energy generation (in kWh), the estimated annual savings, and a clear breakdown of the hardware being installed.
What a quality quote should cover:
- Panel brand, model, and wattage
- Inverter brand and model
- System size in kW
- Daily energy generation estimate (based on your location)
- Estimated annual savings based on your current electricity usage
- STC rebate amount already included in the total cost
- Warranty details for panels, inverter, and installation work
Questions to ask at this stage: Is the installer CEC-accredited? This is required to process your STC rebate and to connect to the grid in Toowoomba. Ask to see their accreditation number if it isn’t already listed on their website or quote.
Are the panels and inverter on the CEC-approved product list? If the answer is unclear, that’s a red flag. The Clean Energy Council has a public list of approved products. Any product not on this list can’t be used in a legal Queensland installation.
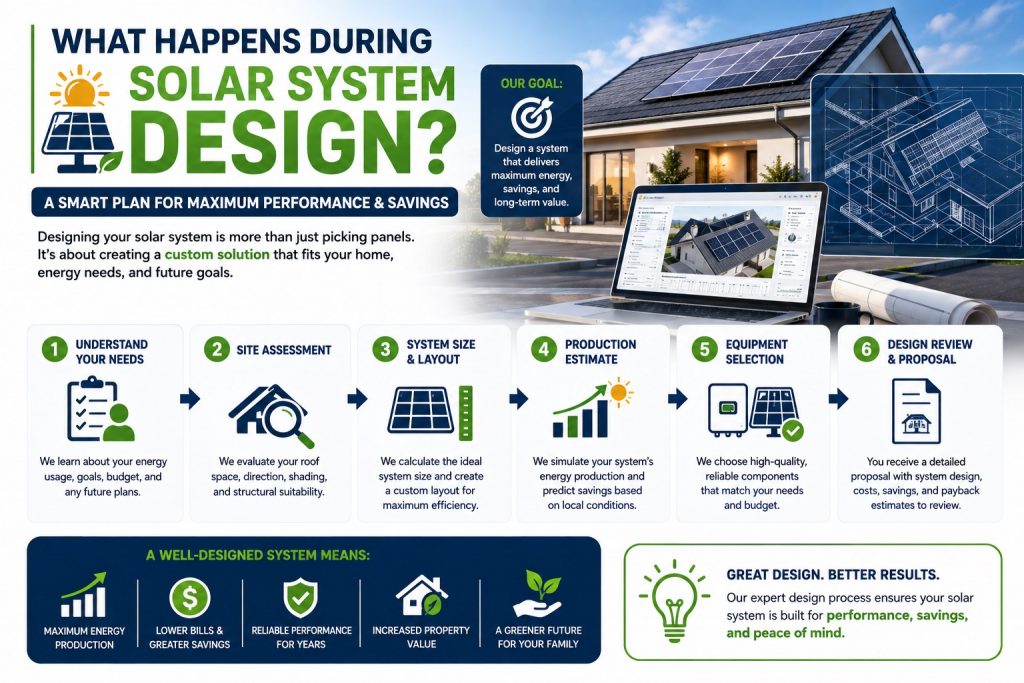
What happens during solar system design?
STEP 2: SYSTEM DESIGN
Once you accept a proposal, the actual design process begins. This is more than just putting panels on a roof drawing. A good system design considers your roof’s slope, direction, and available space, as well as any shading from trees, chimneys, or nearby buildings. It also takes into account your home’s energy usage patterns throughout the day, your current electricity tariff, and whether you’re planning to add Solar battery storage now or later.
For properties in the Hunter region, our design team also takes into account the specific Ausgrid zone rules and any embedded network constraints that apply to your address. Some older homes in parts of Newcastle and Maitland have limits on inverter size that need to be considered during the design, not found out later.
What to look for in the design: Does the proposed layout make sense for your roof? A north-facing array will usually perform better than east- or west-facing in Queensland. If your proposal places panels elsewhere without a reason, ask why.
Has shading been modeled? Even a small amount of shading from a nearby tree or chimney can reduce the system’s output. Ask whether a shading analysis was done and what effect it has on the projected annual generation.
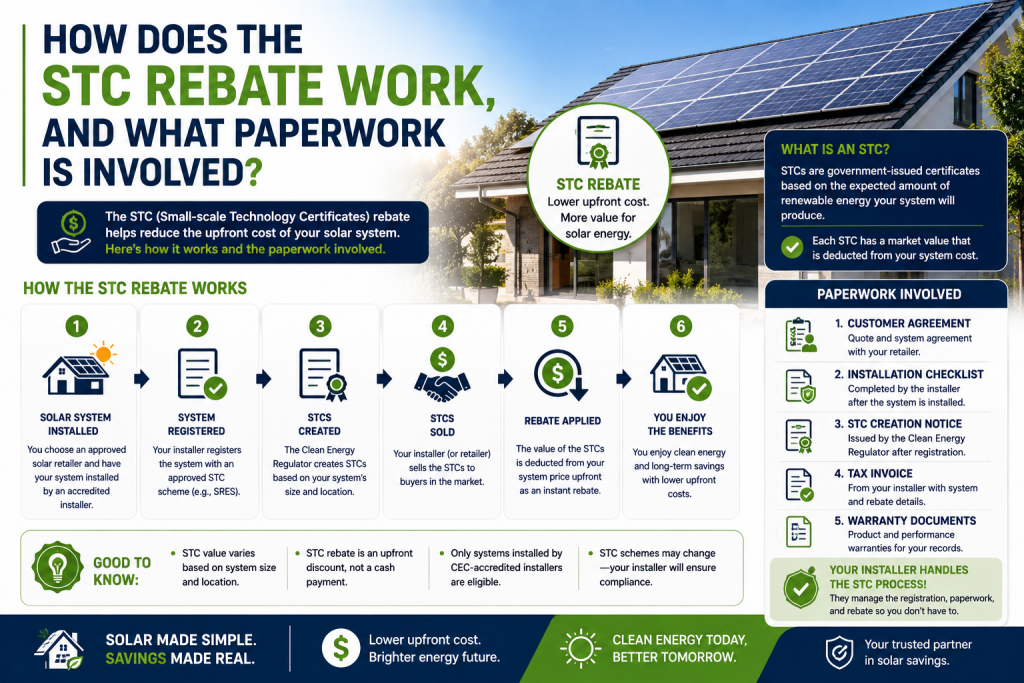
How does the STC rebate work, and what paperwork is involved?
STEP 3: PAPERWORK, REBATES, AND EQUIPMENT ORDERING
This is the part most homeowners don’t see, but it’s where several important things happen at the same time.
The STC rebate: Small-scale Technology Certificates is Australia’s federal solar rebate program. Your installer handles the process on your behalf and applies the value as a discount upfront—you never see the certificates, just the lower price on your invoice. The value of STCs slowly decreases each year until the scheme ends in 2030, so it’s a gentle push to get started sooner rather than later.
The grid connection application: in Toowoomba, connecting a new solar system to the grid requires formal notification or approval from your electricity distributor—Ausgrid, Endeavour Energy, or Essential Energy, depending on where you live. For most standard residential setups, this is a simple notification process. But for larger systems or properties in areas with network issues, it might require a more formal application that takes longer. We manage this for you.
Equipment ordering: panels, inverters, and racking are ordered from our suppliers once the paperwork begins. Lead times vary but are usually 3 to 10 business days for standard residential items.
How long does it take to schedule a solar installation in Toowoomba?
STEP 4: SCHEDULING YOUR INSTALLATION
Once the equipment is confirmed and paperwork is moving forward, your installation is scheduled. The time it takes depends on our current schedule, equipment availability, and your availability. Busier periods like spring and early summer often have longer wait times than slower months.
When we call to confirm your installation day, we can talk about any preparations needed, like accessibility, and let you know who will be on-site with approximate timeframes.
What to expect: For a standard 6.6kW residential system, allow 6 to 8 hours. Larger systems or battery installations take longer. We’ll give you a realistic timeframe when we confirm the booking—not a number that sounds great, but a time that can sometimes take longer than expected.
Technical review: a member of our installation team checks the design against your actual roof before work begins. Sometimes there are differences between what a satellite assessment shows and what the roof looks like up close. If anything changes, we talk to you before proceeding.
What actually happens on solar installation day?
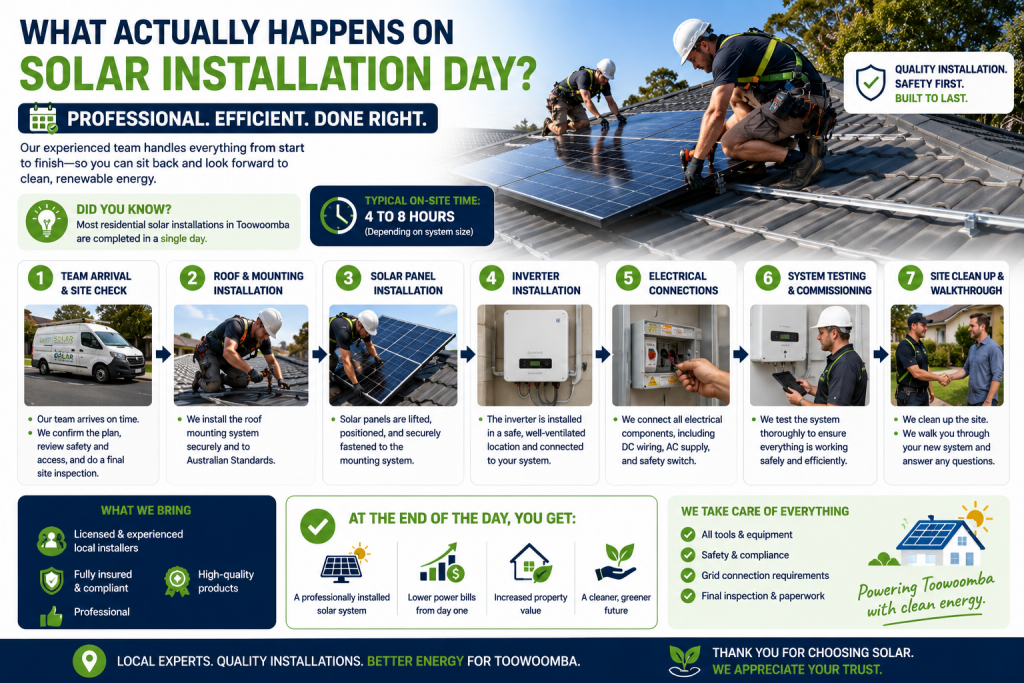
STEP 5: INSTALLATION DAY—WHAT ACTUALLY HAPPENS ON YOUR ROOF
Your installation crew will arrive at the confirmed time, introduce themselves, and get started after answering any questions you may have. You don’t need to be home the entire time, but it helps to be available at the start and near the end when things like your app are ready to be set up. Here’s what happens:
Roof mounting: the team installs the aluminum rails and mounts that hold the panels.
These are fixed to your roof rafters through the roofing material.
Panel installation: panels are lifted onto the roof, slid into the rail system, and secured with mid and end clamps. Each panel is connected in sequence to create the strings that carry DC power to the inverter.
Inverter installation: the inverter is mounted in the agreed location—usually a garage wall, laundry, or sheltered exterior wall. DC wiring runs from the roof to the inverter, and AC wiring connects the inverter to your switchboard.
Switchboard work: a licensed electrician installs the solar circuit breaker, generation meter (if needed), AC isolator, and any other protection devices required by Australian standards.
Battery installation (if applicable): batteries are placed in the agreed location, wired to the inverter or at the switchboard depending on the coupling type, and the battery management system is set up and tested.
How is a solar system commissioned and switched on?
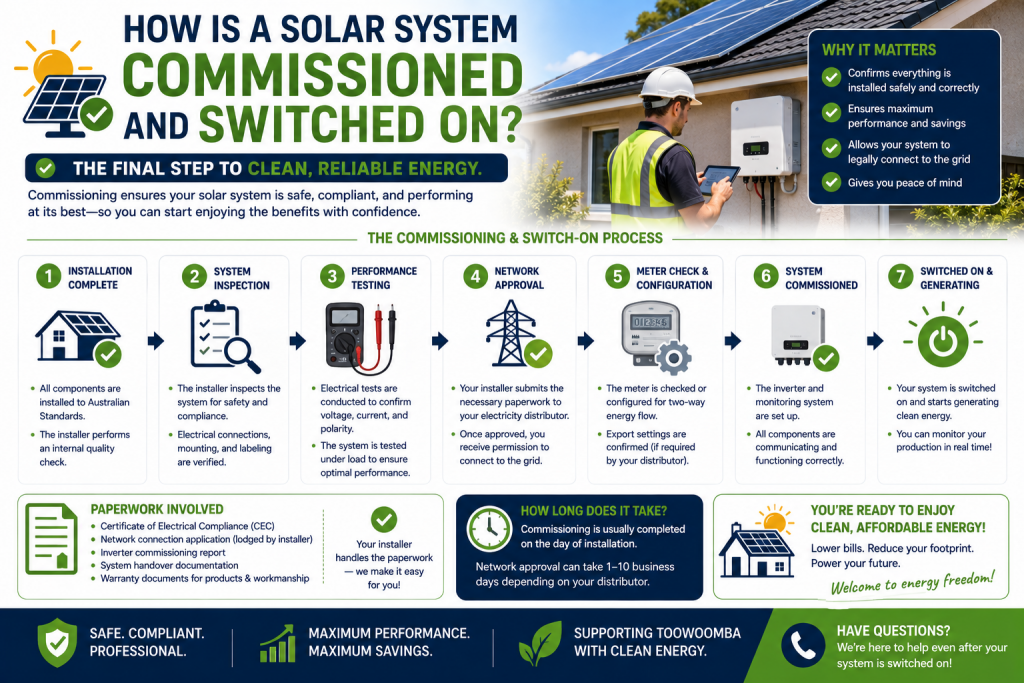
STEP 6: SYSTEM COMMISSIONING AND POWER-ON
Once all the equipment is physically put in place, the system is tested before it is turned on. This includes checking the direction of electricity flow on the DC wires, testing the insulation on the AC wiring, confirming the settings on the inverter, and performing a full test to make sure the system is producing power as expected.
If the system passes all the tests, it is switched on. You should see real-time data about the system’s performance on the inverter screen and in the monitoring app.
Your handover should include:
- A tour of the monitoring app on your phone
- An explanation of what the inverter screen shows and what the lights mean
- A list of where all the switches are and how to shut the system down safely if needed
- All warranty information for the panels, inverter, and installation work
- Your Certificate of Electrical Safety
- A copy of the notification or approval for connecting to the grid
If any of these items are missing when you receive the system, ask for them before the team leaves. It is harder to get these documents later.
How long does it take to connect to the grid after the solar system is installed?
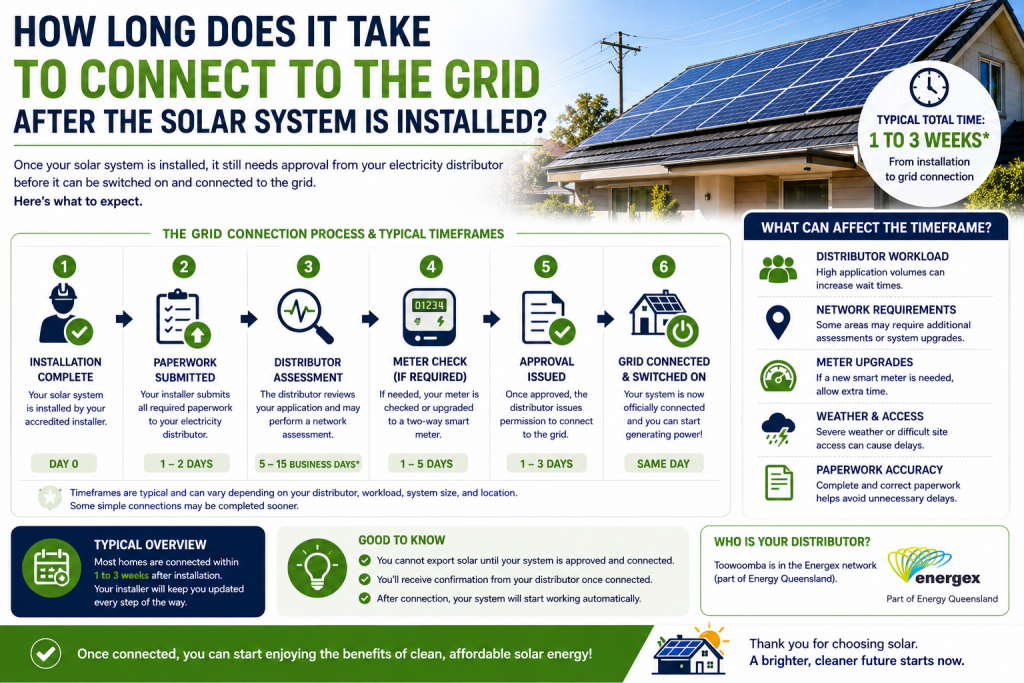
STEP 7: GRID CONNECTION AND METER CHANGE
Inverter Connection: The next step is connecting the inverter to the panel wiring that has been run through the wall. Our installers are experienced in making these connections clean and neat. They use flexible conduit and wiring to create a professional-looking finish. The inverter can now be turned on and connected to your Wi-Fi.
Cleaning the Site: Our team makes sure your property is clean and tidy after installation.
Any trash or leftover materials will be taken away, and no tools or extra items will be left behind.
Informing Your Energy Provider: Now that you have solar, you need to let your energy provider know about the changes to your power setup so you can receive the benefits of feeding power back into the grid.
Our administration staff will complete some forms, called a Service Works Request (SWR), which may need your signature before sending it to your provider (such as AGL or Energy Australia).
This provider may require a new smart meter to accurately measure your solar output.
What should I check in the first weeks after solar installation?
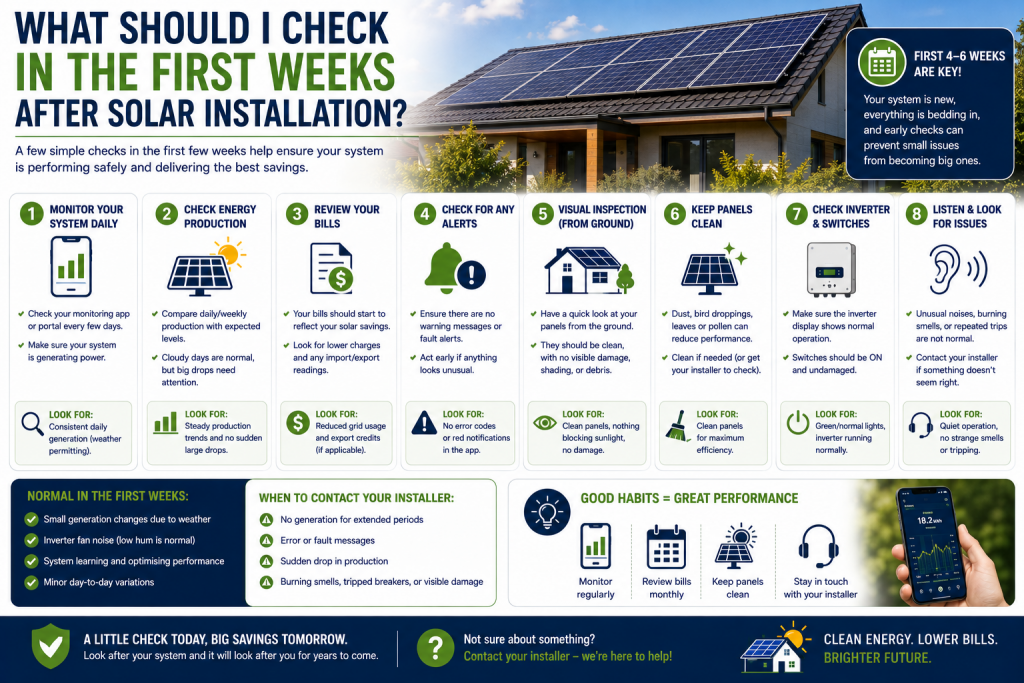
STEP 8: YOUR FIRST WEEKS WITH SOLAR
Check your monitoring data every day for the first week. A 6.6 kW system in the Hunter area on a clear summer day should produce between 30 and 40 kWh. On winter days, the output will be lower. If the system is producing much less than expected, contact your installer.
Your first electricity bill after installing solar will look different. If your meter was read partway through a billing cycle, the bill may only show a partial benefit from solar. Wait for one full billing cycle to see the full impact.
Tell your home insurance company about the solar system. Update your insurance coverage to include the replacement value of the solar panels and inverter. Most insurance companies consider panels and inverters as part of your home and covered under your building insurance.
What is normal:
- The amount of power generated can change every day based on weather, temperature, and season
- The inverter turns off overnight and turns back on automatically in the morning
- Some inverters may show a short error when they start up, but it goes away after a few seconds
- Birds like pigeons may check out the space under the panels in the first few weeks
When to call your installer:
- The system is producing 20% or more less than expected
- The inverter is showing a constant error message
- You see any visible damage on the panels, wiring, or mounting system
- The monitoring app loses connection and doesn’t reconnect within 24 hours
WHAT IS SPECIFIC TO INSTALLING SOLAR IN TOOWOOMBA?
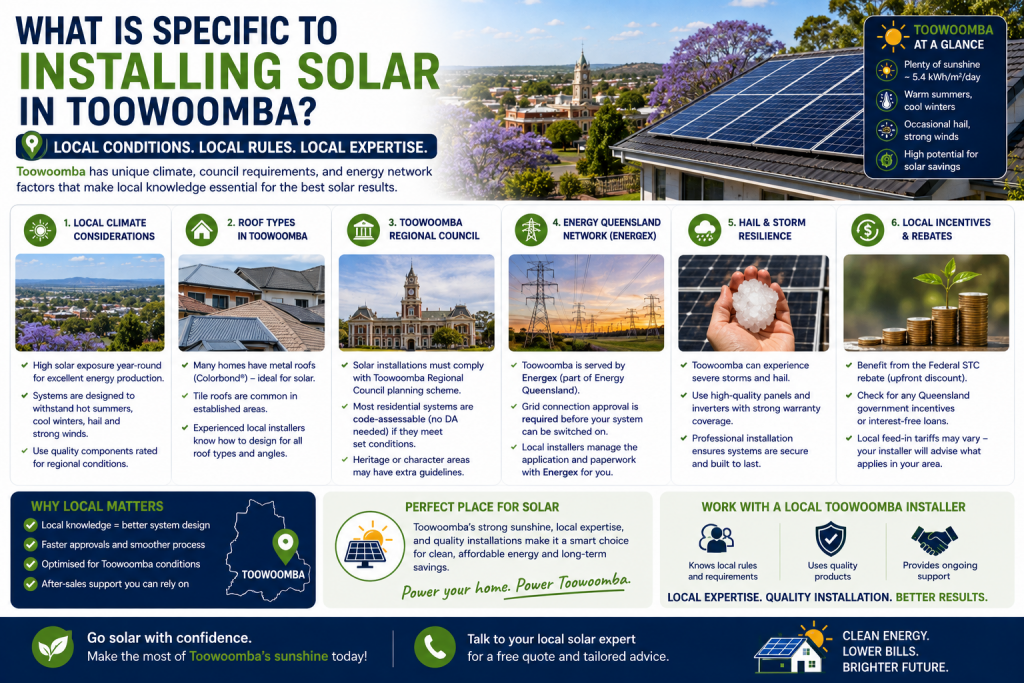
Distributor Zones: Ausgrid covers most of Newcastle, the Hunter Valley, and the Central Coast. Endeavour Energy covers parts of western Sydney and other areas of Toowoomba. Essential Energy serves regional and rural Toowoomba. Each company has its own process and timeline for connecting to the grid. We are familiar with all three.
CEC Accreditation is Required: Your installer must be accredited by the Clean Energy Council to file STC claims and connect to the grid in Toowoomba. If they are not, you won’t get your rebate, and the installation may not meet the Australian inverter grid connection standard (AS/NZS 4777).
Inverter size limits apply in some areas: there are limits on how much solar power can be sent back to the grid. Properties in certain Ausgrid areas have inverter export limits, which affect how much solar energy can be shared with the power network. This is especially important in places where many homes already use solar energy. During the design process, we check your address against these network rules to make sure everything works properly.
The Solar Sharer Offer: From 1 July 2026, eligible households in New South Wales can get three hours of free electricity every day between 11 am and 2 pm under the federal Solar Sharer program. This may change the way solar energy works for you, so it’s a good idea to read our Solar Sharer guide to understand how it affects your solar system.
YOUR SOLAR INSTALLATION CHECKLIST
Before installation day: System design reviewed and accepted; STC rebate paperwork signed; grid connection application submitted by installer; equipment ordered and confirmed; installation date locked in and confirmed; roof access checked (clear paths to roof, no obstacles)
On installation day: Roof mounting rails and brackets installed; panels mounted, wired, and inspected. The inverter was installed and connected; the switchboard was updated with the solar circuit breaker and isolators. Battery installed and connected (if applicable). Full system test and commissioning completed. The system turned on and generated confirmation
At handover: Monitoring app installed and showing live data. The inverter display was explained and understood. Isolator locations shown. Certificate of Electrical Safety provided. Warranty documentation provided (panels, inverter, workmanship). Grid connection notification confirmed
After installation: The home insurer was notified, and the sum insured was updated. First week of monitoring data checked. Feed-in tariff confirmed on the first bill; STC paperwork was lodged by the installer (confirm this happened)
WHAT MAKES A GOOD SOLAR INSTALLATION GREAT
The difference between a solar system that works well for 25 years and one that causes trouble is usually not the brand of the panels. It’s the installation.
Panel orientation and layout: In New South Wales, panels should face north, or as close to north as the roof allows. Northwest is the next best option. East-west setups are good for homes that need energy in the morning and afternoon, not just at midday. The system should be designed to match your energy needs, not just the roof.
Roof condition: Panels are attached to your roof for 25 years. Any tiles, flashing, or gutters that need fixing should be addressed before installation, not after. A good installer will notice this during the site inspection and give you the choice of fixing it before starting work.
Inverter placement: Inverters generate heat. Putting them in a shaded area, like a south-facing garage or laundry wall, helps them last longer than if they’re in a place that gets a lot of sun. Ask your installer where they plan to put the inverter and why.
Get the monitoring working before the team leaves: A system you can’t see is a system you can’t manage. The monitoring app should be live, logged in, and showing real data before the handover.
CONCLUSION
Investing in a solar system should be easy. Choosing a quality installer like Prime Goal you can be confident that any issues will be dealt with professionally and with good solutions.
Most homes and businesses in the Hunter region can save a lot on their energy bills. Knowing what is happening at each stage, choosing a reliable installer, and understanding how to get the most out of your system can really improve your experience.
Frequently Asked Questions
How long does solar panel installation take in Toowoomba?
Most residential solar installations in Toowoomba take between 4 to 8 weeks from the first inquiry to having a working system. The actual installation usually takes 1 to 2 days for most homes. Most of the time is spent on design, ordering equipment, and getting approval from Ausgrid for grid connection.
What happens on solar installation day?
The installation team mounts the racking system to your roof, installs the solar panels, runs wiring from the roof to the inverter, installs the inverter in the agreed location, updates your switchboard with a solar circuit breaker, and tests and turns on the full system.
Do I need to be home during solar installation?
You don’t have to be home the entire time, but it’s helpful to be there at the beginning and near the end for the handover. The team needs access to the roof, the location where the inverter will be installed, and the switchboard.
Can I add a battery after my solar system is installed?
Yes. If your installer used a hybrid inverter, you can add a DC-coupled battery later. If you have a string inverter, an AC-coupled battery can be connected at the switchboard without changing anything in your solar setup.
What paperwork should I get after my solar system is installed?
After your solar system is installed, you should receive a user manual and warranty documents. These will explain your system details, confirm your monitoring app setup, and show that the grid connection notification has been sent to your electricity distributor. Make sure to keep all of these with your property records.
Does installing solar affect my roof warranty?
Most roof warranties remain valid after solar installation, as long as the installer uses the right mounting equipment and properly seals any areas where the system is attached. Check your roof warranty documents and talk to your installer about how they will seal any penetrations before the work starts.
What happens to my feed-in tariff after installation?
Once your meter is set up by your distributor, usually within 1 to 5 business days after installation, any extra solar energy you send to the grid will earn you a feed-in tariff credit on your electricity bill. In New South Wales, current feed-in tariffs are between 3 and 5 cents per kilowatt-hour, depending on your electricity provider.
На этом ресурсе можно отыскать важную информацию.
https://labdiz.ru/full/301-nikolay-drozdov-pochti-90-let-a-zhizn-polna-novykh-tvorcheskikh-marshrutov.htm
Тут портале вы сможете обнаружить нужную информацию.
https://e-transavto.ru/read/effektivnye-strategii-dlya-igry-v-ruletku-na-randx-485/
На данном портале удастся найти полезную информацию.
https://altrades.ru/finance/330-istoriya-brenda-dolceandamp-gabbana-v-mire-obuvi-ot-pervykh-modeley-do-sovremennykh-krossovok.html